

Your kitchen rug catches every splash, spill, and streak that comes its way.
While it protects your floors and adds comfort, it also collects grease, bacteria, and food particles that regular vacuuming can’t touch. Most people throw it in the wash and hope for the best, but that approach often ruins the backing or sets stains permanently.
The key to spotless kitchen rugs isn’t brute force. It’s understanding what you’re cleaning and using the right techniques at the right time.
Let’s walk through the professional methods that actually work.
Identify Rug Type And Backing
Before you spray anything on your rug, you need to know exactly what you’re working with. Kitchen rugs typically come in two varieties: synthetic materials like polypropylene or nylon, and natural fibers such as cotton or jute.
Check The Backing Material
Flip your rug over and examine the underside closely. A waffle-patterned rubber or latex coating means you have a non-slip backing that hates heat and harsh chemicals.
This backing keeps your rug in place but will crack and crumble if exposed to high dryer temperatures or bleach. Woven backings are more breathable but allow spills to penetrate through to your floor, requiring you to clean both sides.
Test Fiber Colorfastness
Bright kitchen rugs often bleed dye when wet. Take a damp white cloth and press it firmly against a colored section for thirty seconds. If dye transfers to the cloth, you cannot flood this rug with water.
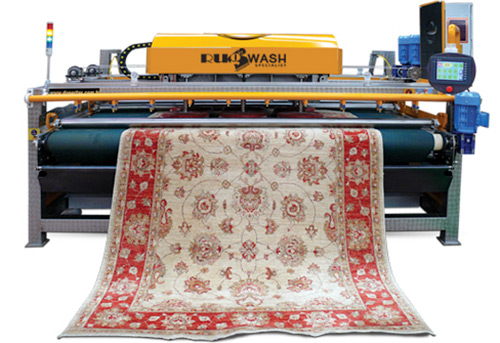
For rugs with bleeding colors or delicate natural fibers, consulting a professional like Rug Wash Specialist prevents permanent damage from DIY attempts.
Spot Hidden Spills With UV
You wiped up the visible tomato sauce, but protein-based spills like milk, egg whites, and meat juices often dry clear and become invisible to your eyes.
- Darken The Room Completely: Wait until evening or close all blinds to eliminate ambient light. UV fluorescence is faint and gets washed out by daylight or LED overhead lights.
- Scan With 365nm UV Light: Use a UV flashlight in the 365nm to 395nm range. Hold it about two feet above the rug and move slowly. Biological materials glow pale yellow or blue-green under this light.
- Mark The Invisible Spots: Place small pieces of painter’s tape on glowing areas. These phantom stains harbor bacteria and cause mysterious kitchen odors that need enzymatic treatment.
By targeting these hidden deposits, you eliminate the bacteria creating odors rather than just masking surface dirt with fresh scent.
Pre-Treat Fast With Enzymes
Kitchen stains blend grease and proteins in ways that confuse standard detergents. You need specialized biological cleaners to break these bonds.
Select The Right Enzyme Group
Look for a multi-enzyme cleaner listing both lipase and protease on the label. Lipase digests fat molecules from cooking oil and butter splatters. Protease breaks down protein chains in meat, eggs, and dairy.
Generic cleaners just push grease around, while enzymes consume the stain as fuel. This biological approach works far better than chemical surfactants alone.
Apply Warm, Not Hot
Enzymes function best at specific temperatures, typically around 100°F to 110°F. Scalding hot water denatures these biological catalysts and kills their cleaning power instantly.
Ice-cold water makes the reaction too slow to be effective. Spray your enzymatic solution liberally on marked spots and let it sit for fifteen to twenty minutes before blotting.
Blot Correctly To Stop Spread
When you scrub a fresh spill vigorously, you untwist fiber yarns and drive pigment deeper into the pile. This makes stains worse, not better.
- Work From Outside In: Start blotting at the spill’s outer edge and move toward the center. This containment approach prevents liquid from migrating into clean fibers and keeps the stain footprint minimal.
- Use A White Cotton Towel: Colored rags or printed paper towels can transfer their own dyes onto your wet rug. Plain white cotton terry towels absorb well and let you see how much stain you’re lifting.
- Apply Downward Pressure Only: Press straight down or stand on the towel if needed. Direct compression transfers liquid from rug to towel. Avoid side-to-side motion that damages pile texture and causes fuzzing.
You may need to repeat this blotting process multiple times with fresh towel sections until no more color transfers to the cloth.
Rinse Without Soaking The Pad
Oversaturation ruins more rugs than any other cleaning mistake. Too much water penetrates the backing and dissolves the adhesive latex layer.
Use A Mist-Extraction Technique
Fill a spray bottle with cool, clean water instead of pouring directly onto the rug. Mist the enzyme-treated area until damp but not soaked. Immediately blot this moisture up with a dry towel.
This rinse-and-blot cycle removes detergent residue and suspended soil without saturating the rug’s core. Leftover detergent is sticky and attracts new dirt faster than before, sabotaging your cleaning effort.
Protect The Subfloor
For heavy spills requiring more water, slide a plastic garbage bag or baking sheet under that specific spot. This barrier protects hardwood or tile from water damage and prevents the rubber backing from sitting in a puddle. Moisture trapped under a rubber-backed rug creates mold growth and floor discoloration problems within days.
Lift Sugar Spills With Hydro-Steam
Spilled soda, juice, or syrup hardens into crystal-like bonds that cling stubbornly to fibers. Cold water fails to dissolve these cured sugars effectively.
Rehydrate The Sugars
Steam provides heat and moisture to melt hardened sugar bonds. If you have a home steam cleaner, hold the nozzle about three inches above the sticky spot. You want to inject warmth without blasting the fibers. Without a steamer, hover a hot iron over a damp cloth placed on the spill to generate sufficient steam.
Extract While Warm
Once liquefied, sugar must be removed immediately before it cools and re-hardens. Blot rapidly with a clean towel while the area remains warm. For severe cases, a wet-dry vacuum extracts the sugar water efficiently. This prevents the sticky-spot phenomenon where cleaned areas turn black again because residual sugar captures shoe dust.
Steam Out Allergens And Bacteria
Kitchen rugs harbor dust mites, bacteria tracked from outside, and allergens dropped from counters. Steam cleaning sanitizes without harsh chemicals that leave residues.
- Vacuum Thoroughly First: Steam-cleaning dusty rugs creates mud. Remove all dry particulate soil with a high-suction vacuum before introducing moisture. Vacuum in two perpendicular directions to lift the pile properly.
- Maintain Optimal Temperature: Steam must reach at least 212°F at the nozzle to effectively kill bacteria and dust mites. Move the steamer head slowly, about one foot per second, ensuring adequate heat penetration.
- Avoid Over-Steaming Rubber: While fibers benefit from heat, rubber backings don’t. Keep the steam head moving constantly. Dwelling too long melts synthetic backings or permanently warps rug shape.
Regular steam sanitation reduces microbial loads in your kitchen, creating a safer food preparation environment and reducing potential allergen triggers for your family.
Use Encapsulation To Prevent Residue
Encapsulation technology traps dirt in microscopic polymer crystals, making it perfect for maintaining kitchen rugs between deep cleans.
Apply Encapsulant Spray
Purchase an encapsulation cleaner, often labeled as low-moisture or crystallizing cleaner. Spray a light mist over the high-traffic lanes of your kitchen rug. These polymers surround soil particles and detach them from fibers. Unlike sticky detergents, these polymers dry into brittle, non-sticky crystals. The rug dries in about twenty minutes, minimizing kitchen downtime during busy days.
Vacuum To Remove Crystals
Once completely dry, vacuum the rug thoroughly. The vacuum sucks up crystallized polymers along with trapped dirt. This method leaves zero sticky residue, so your rug stays cleaner longer.
For heavily soiled rugs needing intensive care, consider professional cleaning services, but encapsulation extends the time between those deep professional washes effectively.
Machine-Wash Washable Rugs Safely
Many modern kitchen runners claim to be machine washable, but careless washing destroys them quickly. The agitation and spin cycles are often too aggressive.
Load Balance Is Key
Never wash a rubber-backed rug alone. The heavy, wet rubber throws your washing machine drum off-balance during spin cycles, potentially damaging both machine and rug. Wash two small rugs together or add old towels to balance the load. Use cold water exclusively, as hot water disintegrates rubber backing and shrinks the rug.
Air Dry Only
This rule is non-negotiable: never put rubber-backed rugs in the dryer. Intense heat melts adhesive and causes backing to flake off in chunks. Lay the rug flat on a drying rack or hang it over a shower rod. Ensure complete dryness before returning it to the floor, as trapped moisture underneath breeds mildew and damages flooring.
Set Simple Maintenance Alerts
Consistency beats intensity when it comes to rug longevity. Reactive cleaning means you’re always fighting accumulated grime, while proactive maintenance keeps rugs looking new with minimal effort.
- Weekly Shake-Out: Take your rug outside once a week and shake it vigorously. This removes heavy, abrasive grit that vacuums miss, grit that acts like sandpaper cutting fibers with every footstep.
- Monthly Rotation: Kitchens have fixed traffic patterns from sink to fridge to stove. Rotate your rug 180 degrees monthly to distribute wear evenly and prevent traffic lanes from forming permanently.
- Quarterly Deep Clean: Set a calendar reminder every three months for deeper cleaning using enzyme or steam methods. Addressing soil before it becomes impacted makes cleaning significantly faster and more effective.
Following a strict schedule prevents the buildup of grease and compacted soil that eventually becomes impossible to remove, protecting your investment for years.
Your Kitchen Deserves Better Than Surface Cleaning
Cleaning kitchen rugs effectively requires understanding materials and chemistry, not just effort. By identifying your rug’s backing, using proper enzymatic tools, and mastering the blotting technique, you reverse damage from daily kitchen chaos.
Treat your rug with the precision you apply to cooking, and it remains a vibrant, hygienic element of your home rather than a grimy afterthought.
Start today by checking that backing and implementing these professional techniques. Your kitchen will be cleaner and healthier for it.
Sources and Verifications
-
Carpet and Rug Institute, Cleaning Guidelines for Textile Floor Coverings, www.carpet-rug.org/residential-customers/cleaning-and-maintenance
-
Institute of Inspection, Cleaning and Restoration Certification, Textile Cleaning Standards, www.iicrc.org/consumers/care
-
American Cleaning Institute, Enzyme-Based Cleaning Products Technical Information, www.cleaninginstitute.org/understanding-products/ingredients/enzymes
